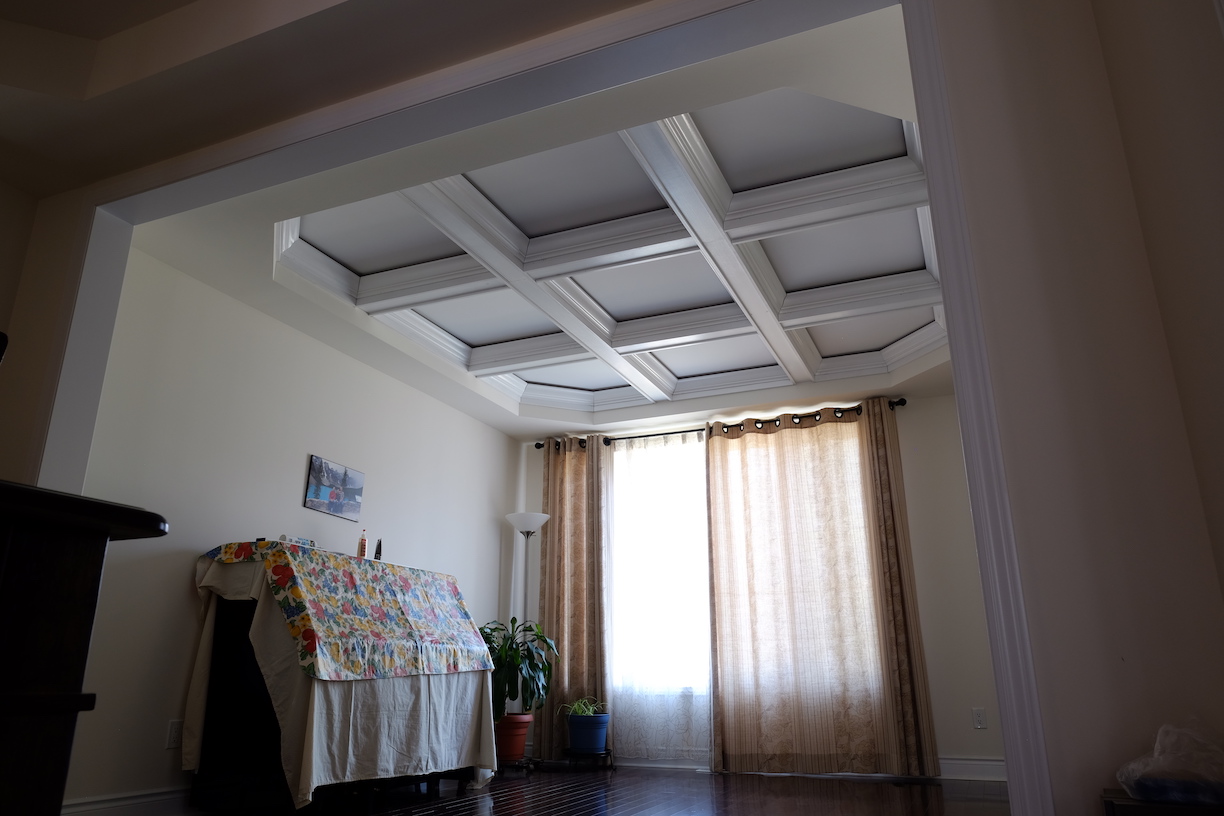
Coffered Ceiling
Jul 8, 2018
Having just graduated from university, I was bored staying home for the month before starting my first full-time job. I tried to find a project for myself to both do something productive and hopefully learn something new. I decided on building a coffered ceiling1 in my parents’ living room.
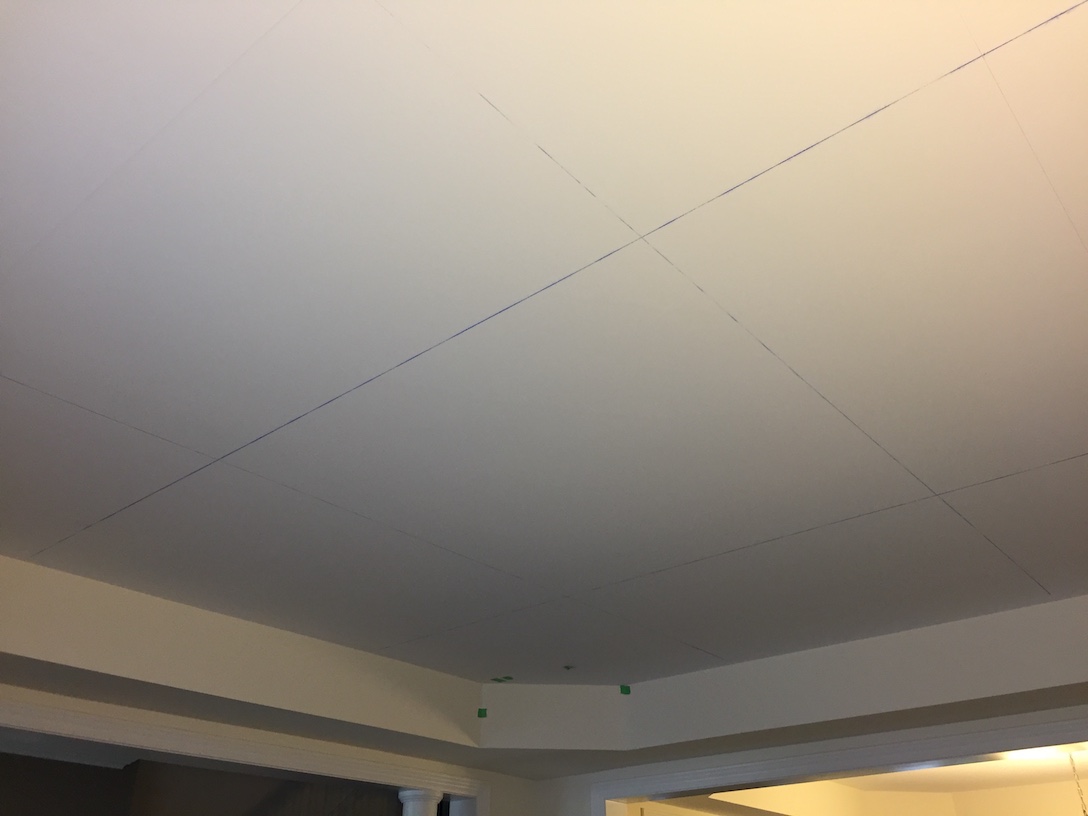
The first step was to measure the ceiling, and mark up where the box beams — the section that sticks out from the ceiling and acts as the sides of each coffer — should go. I did this with the help a tape measure and some chalk line.
Next was the actual box beams. I did a quick Google search which revealed that there are different ways to creating the box beams. I chose the method that involved creating cross-shaped and straight supports. These supports are glued and nailed to the ceiling, then the sides and bottom of the box beam are attached to the supports. I felt this was the most straight forward approach.
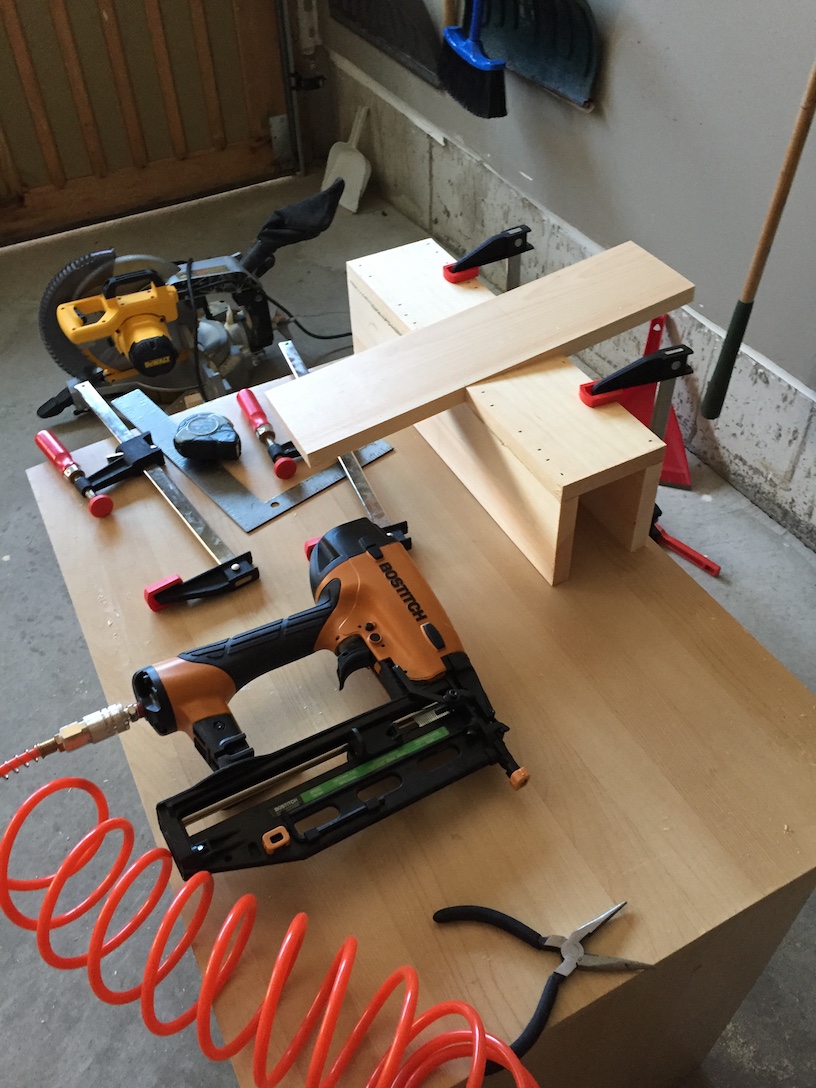
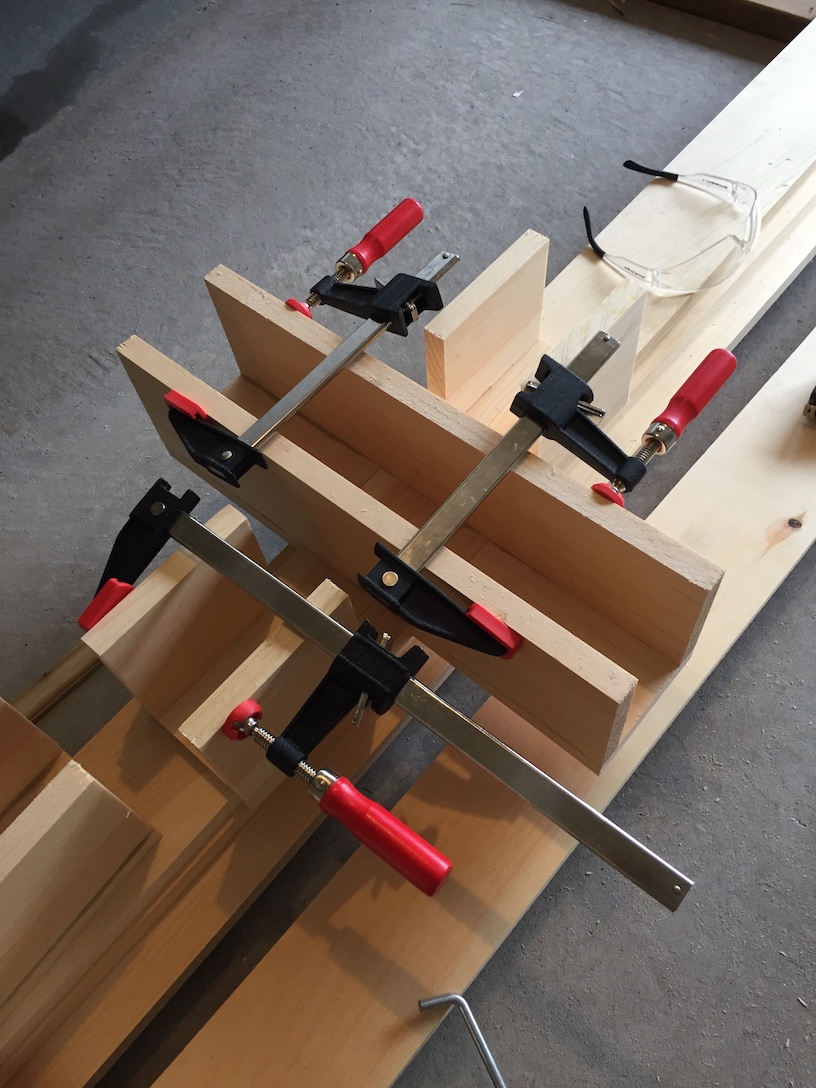
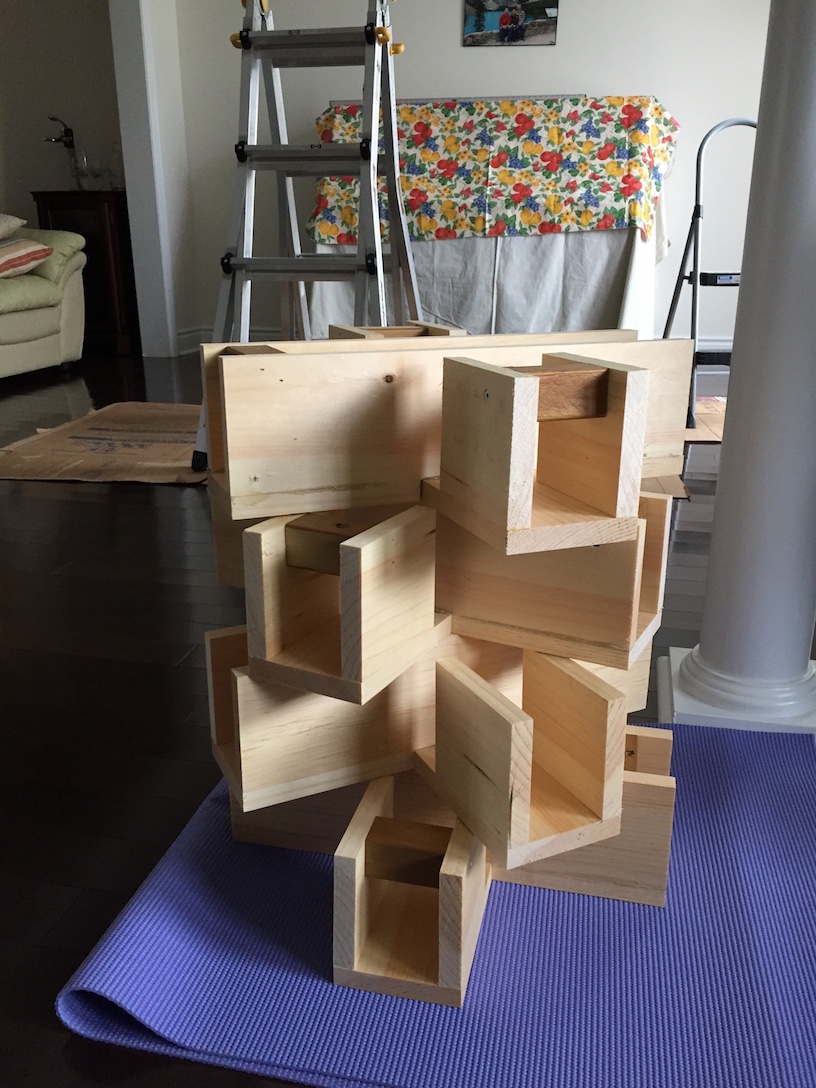
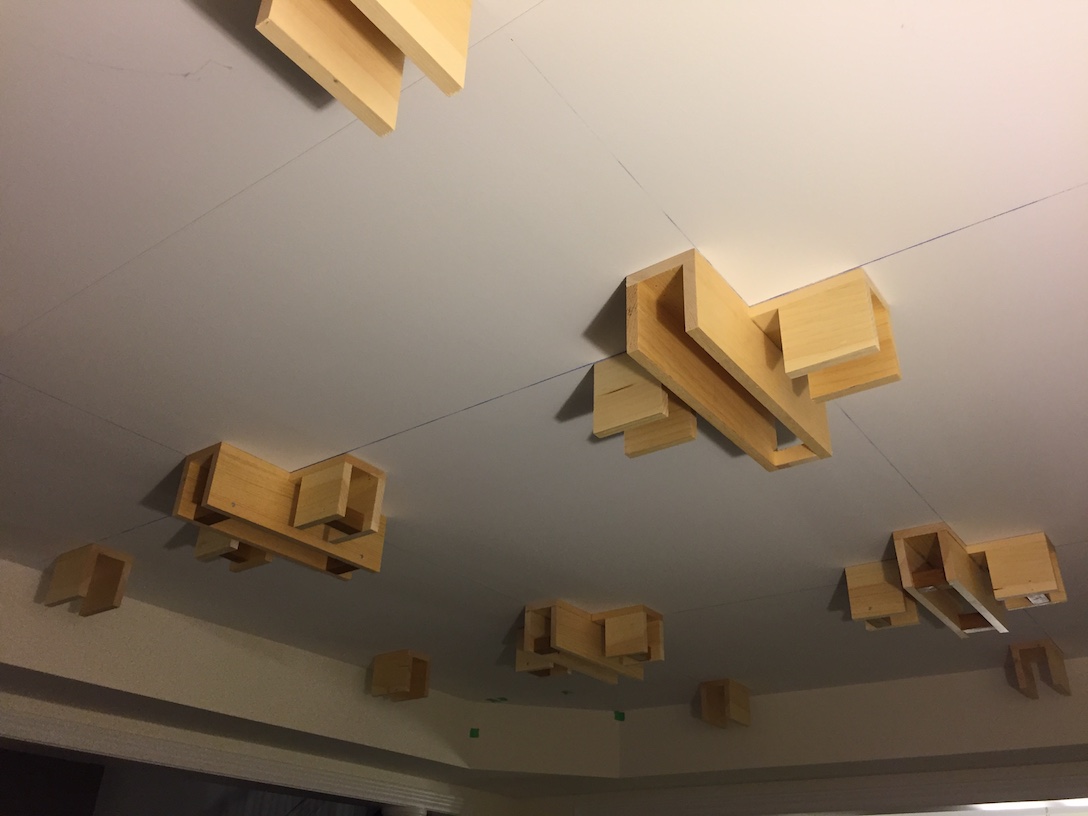
One issue I ran into when I first made the supports was that the wood were not all equal in width. I did not plan for this which made some supports upto 1/16th wider than others. This was a pain, and I went back and used pieces of 2x2 and screws to fix the supports that were wider. If you zoom in onto the pictures of the supports attached to the ceiling, you’ll see the 2x2 in between some sides of the cross supports.
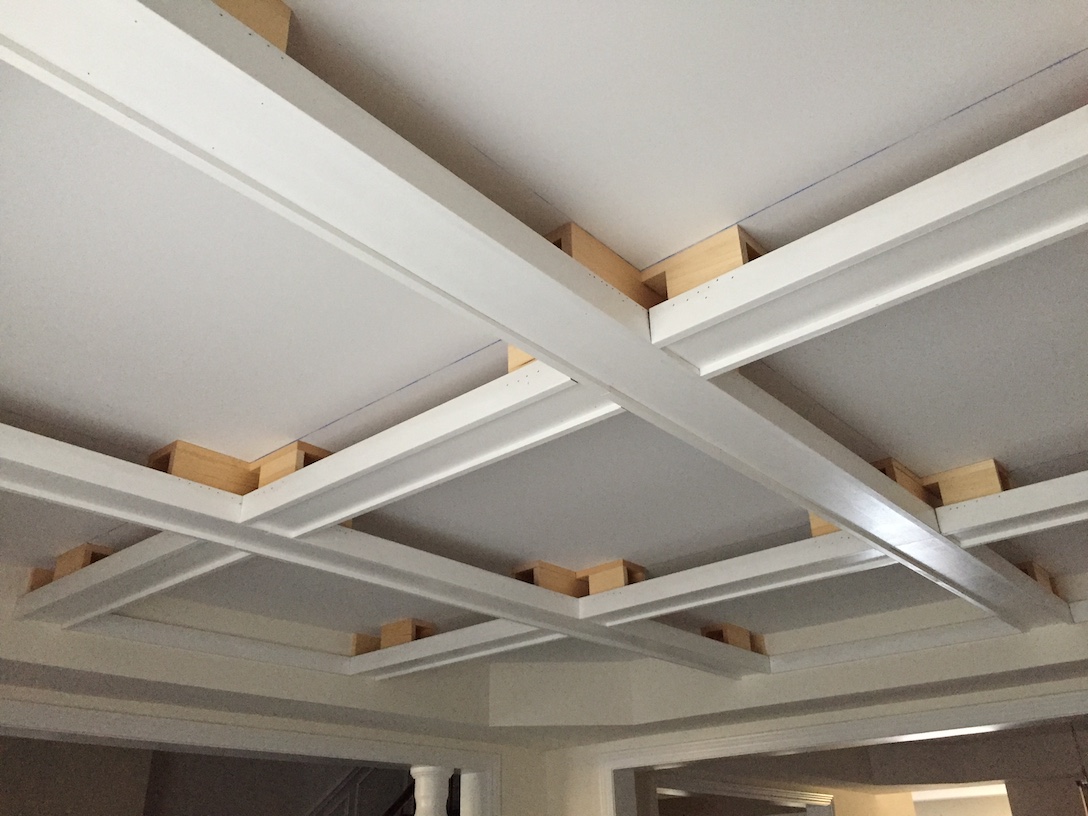
After the gluing and nailing the supports to the ceiling, I waited over night for the glue to dry then attached the sides and bottom of the box beams. This part was again frustrating because the plywood strips that I had Home Depot cut were not all the same width. This meant that there are gaps between the sides and bottom at some location of the box beam.
With the sides and bottom completed, the final step was to install the crown moulding in each coffer. This was definitely the most time consuming step. In between measuring, cutting, test fitting, re-cutting, and re-test fitting, it took me minimum 30 minutes per box. The non-right angle corners were also especially tricky to cut and join.
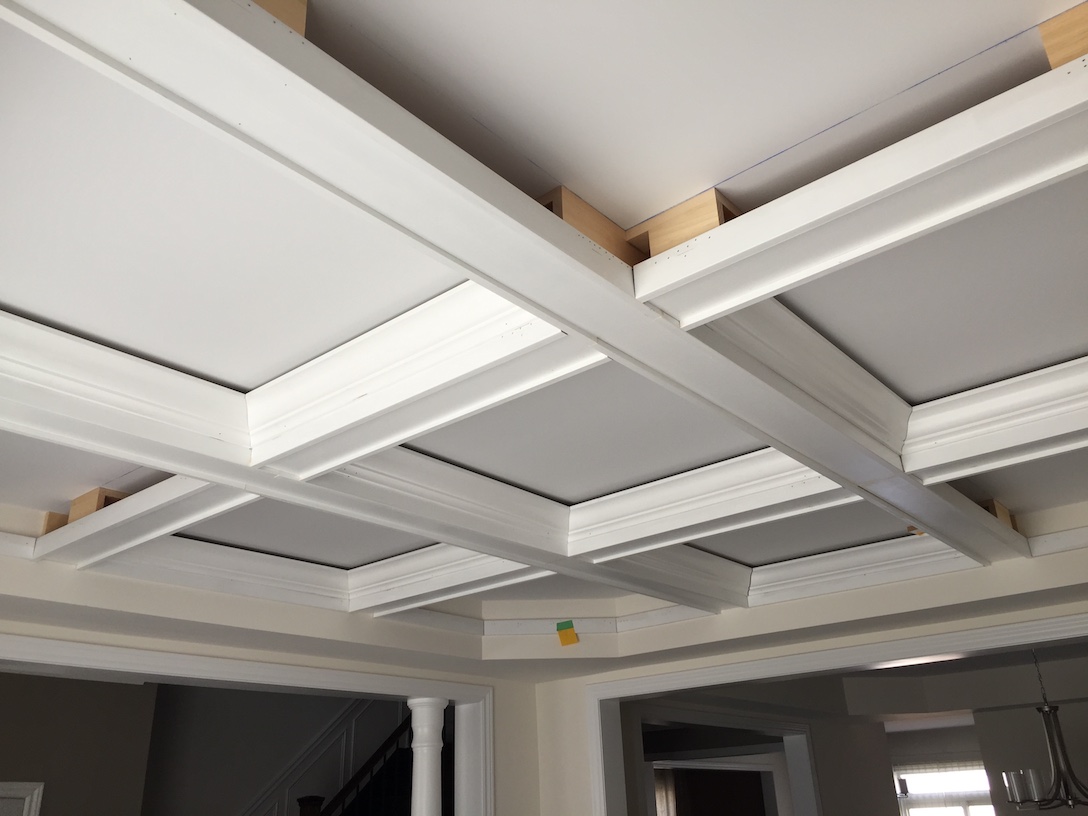
Overall the project took my mom, dad, and I two weeks of on and off work to complete. There were many things that I did not anticipate that would slow me down, for example the irregularity in widths of the wood. There were also many time consuming steps that I did not mention like priming and painting. There’s still gap and nail-hole filling, chalking, and the final layer of paint, but those I’ll leave for later.